Last Updated on October 20, 2026 by Umar Farooq
Spring paver maintenance has an order, and most people run it backwards. Walk the surface and mark anything that moved, reset those pavers, wash the patio, refill only the joints that lost sand, and test the sealer last. Sealing is the one step you cannot easily undo, so it goes at the end, and often it does not happen at all.
Winter inspects your patio whether you asked it to or not. It just does not leave a report. The job in April is to read the evidence: heaved corners, rocking units, joints that emptied, a white film where the de-icer sat.
Do spring paver maintenance in this order
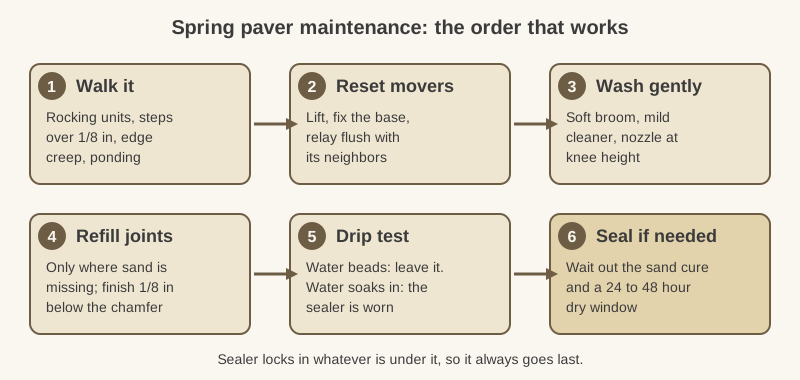
Three checklists (Unilock, Belgard and a landscape contractor) list the same chores: clean, pull weeds, check for movement, top up the joint sand, maybe seal. None says why the order matters, so here it is. Dirt hides damage, so you wash before you judge the joints. Damage changes how much sand you need, so you reset pavers before you refill. And a sealer fixes in place whatever is under it, including a loose paver and a dirty joint.
Walk it with a straightedge and a pocket of chalk
Freeze and thaw cycles can heave or flex pavers, according to Unilock's spring guide, which means shifting, sinking and trip hazards. Walk the whole patio slowly and look for:
- Rocking units. Step on each paver near the edge. Anything that clicks or tilts has lost its bed.
- Steps between neighbors. The ICPI limit for pedestrian routes is 1/8 inch between adjacent pavers. A straightedge laid across a suspect spot shows it quickly.
- Creep. Unilock says to check for pavers drifting and to confirm the edge restraints are still holding. A gap opening against the restraint or a bowed row means the field is trying to spread.
- Ponding. After a rain, standing water marks a low spot that will freeze next winter.
Mark each problem with chalk. If most of the patio is fine and three pavers are not, that is a repair, not a rebuild. A heaved patio is a different story, and pavers heaving in winter explains what to do.
Lift and reset the pavers that moved
Unilock's method for a single bad unit is plain: pry it out with a flathead screwdriver after removing the sand around its edges, top up and level the base material, then set the paver back flush with its neighbors.
The step-by-step is in replace a broken paver. The rule I would add: if a paver sank, fix what is under it. Dropping extra bedding sand into the hole is the classic mistake, because a thick patch of sand compresses more than the thin layer around it, and the dip comes back.
Wash gently, and keep the nozzle high
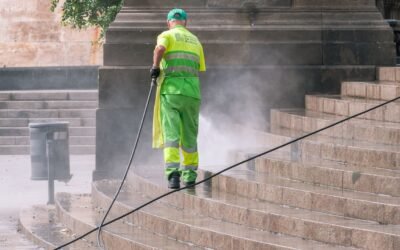
Both Unilock and Belgard keep the cleaning simple: soap and water or a mild cleaner, a stiff broom, and a hose. If you use a pressure washer, Unilock says to set it low, use a fan tip, hold it at knee height and angle it about 45 degrees so it does not dislodge the joint sand. Belgard warns that power washers can strip the finish and expose the aggregate. R&M Landscape's checklist goes further and prefers a broom and cleanser to a washer altogether.
For green growth, Unilock suggests equal parts bleach and water, or white vinegar left 10 to 15 minutes. Other sources use much weaker bleach mixes, so check our bleach guide before you mix. If you see a white chalky film after winter, test it before assuming it is dirt: it may be efflorescence, which needs a different cleaner.
Weeds and joint sand: refill only the gaps
Pull weeds while the roots are soft and sweep the seeds off before they settle. Belgard adds a granular weed preventer in the joints, since some weeds can push pavers apart over time.
For sand, Unilock's instructions for polymeric sand are to scrape out failed sand to about 1 1/2 to 2 inches, sweep in fresh sand to about 1/8 inch below the chamfer, and mist it to activate the binder. Pick a dry week, because rain right after is the enemy. The whole process is in re-sand pavers.
Seal in spring only if water soaks in
Drip water on the paver. Belgard says if it beads, the pavers are still protected, and if it soaks in straight away, it is probably time. Belgard also says not to seal more than once in three years, because stacked coats build a film that can discolor in sunlight. Unilock calls sealer entirely optional on its own pavers and wants a 24 to 48 hour dry window.
If you just re-sanded, the calendar matters. Techniseal's natural-look sealer asks for 30 days after polymeric sand (Techniseal data sheet), so April's sand means May's sealer. The full reseal rules are in how often should pavers be sealed.
Inspect first, wash second, seal when the drip test says so
The best result of spring paver maintenance is finding a loose corner in April, not a tripped guest in July. If the water beads, put the sealer back on the shelf. If you are staring at a patio that needs more than three resets, read about the base before you buy another bag of sand. Otherwise, go and sit on the patio you just inspected. You earned it, and it has been standing there all winter, waiting.
FAQ
When should I do spring paver maintenance?
Once the ground has thawed and the freeze and thaw cycles are over, and when you have two or three dry days in a row for joint sand or sealer. Walking the patio and resetting loose pavers can happen as soon as the snow is gone.
Do I need to reseal my pavers every spring?
No. Belgard says not to seal more than once in three years, and Unilock calls sealer optional. Drip water on the surface: if it beads, the sealer is working, and if it soaks in, it is time to plan a reseal.
Can I pressure wash pavers in spring?
Yes, carefully. Unilock suggests a low setting, a fan tip, the nozzle at knee height and a 45 degree angle to avoid blasting out the joint sand. Belgard warns it can remove the finish and expose the aggregate, so test a hidden spot first.
How do I tell if pavers shifted over winter?
Look for rocking units, steps of more than 1/8 inch between neighbors, gaps at the edge restraint, and low spots where water stands after rain. Walk the patio and chalk each problem before you start cleaning.