Last Updated on September 23, 2026 by Umar Farooq
A concrete patio with paver border is usually built by laying one to three rows of pavers beside the slab, on their own compacted gravel base, with the paver tops flush with the concrete. It is the gentlest renovation a gray slab can get: nothing gets broken, and the patio gets bigger and better dressed. The border needs its own base and an edge restraint on the outside. The joint where pavers meet concrete should be a tight, sand-filled joint, never mortar. If you want to cover the whole slab instead, that is a paver overlay, and it follows different rules.
Below are the four ways to add a border, then the details that decide whether it stays flush: base, height and the joint.
Four ways to put pavers around a concrete patio
| Method | What it does | Best for |
|---|---|---|
| Border beside the slab | Pavers on a new base alongside the slab, flush with it | Widening a patio and framing it; the standard approach |
| Saw-cut and replace the edge | Cut 8 to 16 in off a damaged slab edge and pave the strip | Crumbling or chipped slab edges |
| Border on top of the slab | Thin pavers glued or mortared around the slab's perimeter | Only as part of a full overlay |
| New slab poured with a border | Pour the slab smaller and pave around it, or pour a concrete band around pavers | New construction |
The first method covers most projects, and most of this guide. The on-top method creates a raised lip at the edge of the slab unless the whole field gets paved too. At that point you are doing a full overlay, and our guide to pavers over concrete covers drainage holes, thin pavers and the added height at doors.
Check the slab before you frame it

A border draws attention to the slab it surrounds, the way a nice frame draws attention to a water-stained print. Before you add one, make sure the concrete deserves it:
- Cracks: hairline shrinkage cracks are normal. Cracks with one side higher mean the slab is moving, and a border beside it will follow.
- Slope: the slab should fall at least 1.5% (ICPI's minimum) and, within 10 feet of the house, 2%, or a quarter inch of drop per foot (IRC R401.3; confirm with your building department). The border must carry that slope out to its edge. If the slab drains toward the house, fix that first.
- Height: the slab sets the border height. Check the border will still sit slightly above the lawn so water runs off.
- Edge condition: a rounded, tooled or chipped edge leaves a V-shaped gap against a square paver. A clean saw cut gives the pavers a square face to butt against.
If the slab is heaving, badly cracked or draining the wrong way, don't frame it. Replace it, or pave over the whole thing.
Widening a concrete patio with a paver border
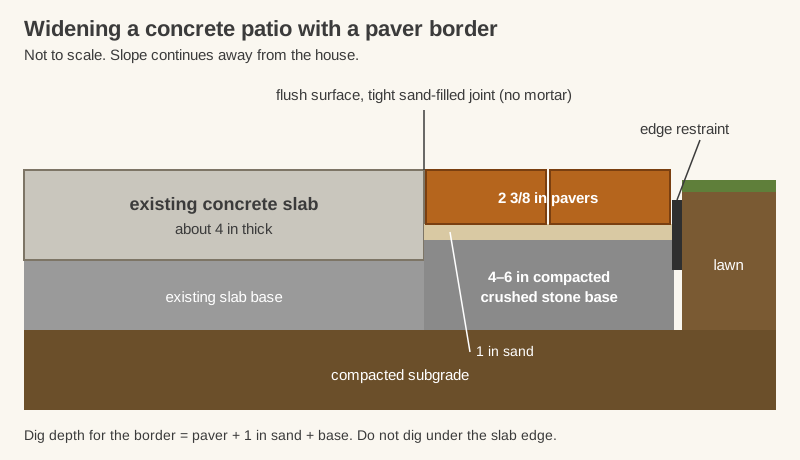
This is the classic concrete patio paver border: a band of pavers along one, two or three sides of the slab, built exactly like a small paver patio.
- Mark the border width with string, measured from the slab edge. Plan in whole paver widths so the outer row needs no cuts.
- Dig the trench. Depth = paver thickness + 1 inch of sand + base. For 2 3/8-inch pavers and a 4- to 6-inch base, that is roughly 7 1/2 to 9 1/2 inches below the slab surface. Add about 6 inches of width on the outside so the base extends past the edge restraint.
- Protect the slab edge. Dig straight down along the concrete without undercutting it. If you disturb the soil beneath, pack it back with base stone and tamp it.
- Compact the subgrade, then build the base in layers of 2 to 3 inches, compacting each one. A plate compactor fits in a trench 12 inches wide or more. For narrower strips, use a hand tamper or rammer. Our guide to paver base covers depth on different soils.
- Screed a 1-inch layer of C33 concrete sand (never stone dust or mason sand), and leave it loose. Use short screed rails, or rest one end of the screed board on the slab and notch it so it strikes the sand at the right depth below the concrete surface.
- Lay the pavers starting against the slab and working outward. The slab edge is your straight line.
- Install the edge restraint on the outside, then compact the pavers and sweep joint sand into the joints, including the joint against the slab.
The slab does the inside restraint's job, so the border only needs a restraint on its outer edge. For soldier courses, sailor courses and double rows, see our paver border design guide.
Step 4 is the one I'd underline twice. In a narrow trench it's tempting to shovel all the stone in and tamp the top. The bottom stone never feels it, settles, and the border ends up a step below the slab. The lift thickness in ICPI Tech Spec 2 (4 to 6 inches) is written for a 7,000 lbf machine; anything smaller should get thinner lifts, the same spec says. Rental plates usually are smaller, and hand tampers far smaller, so keep lifts thin, damp and overlapped. Rent the plate for a day; don't buy one.
Matching the pavers to the slab height
A border that sits 1/4 inch high catches toes and chair legs. One that sits low collects water along the slab edge. Aim for flush.
Set the pavers slightly proud before compaction. Pavers settle into the sand when the plate runs over them. CMHA allows them to sit 1/8 to 1/4 inch above final grade before compaction; beside a slab, aim for about 1/8 inch so they finish flush.
Account for the slab's slope. On the low side, the border continues the slope rather than leveling out; along the sides, it follows the slab's fall. Measure down from the slab edge at several points instead of using a level.
Expect small seasonal movement. A slab and a sand-set border sit on different foundations, and in freeze-thaw climates they can move slightly out of plane over a winter. A well-drained, well-compacted base under the border keeps that small, which is why a border that is "only" one or two pavers wide still gets a proper base.
The joint between concrete and pavers
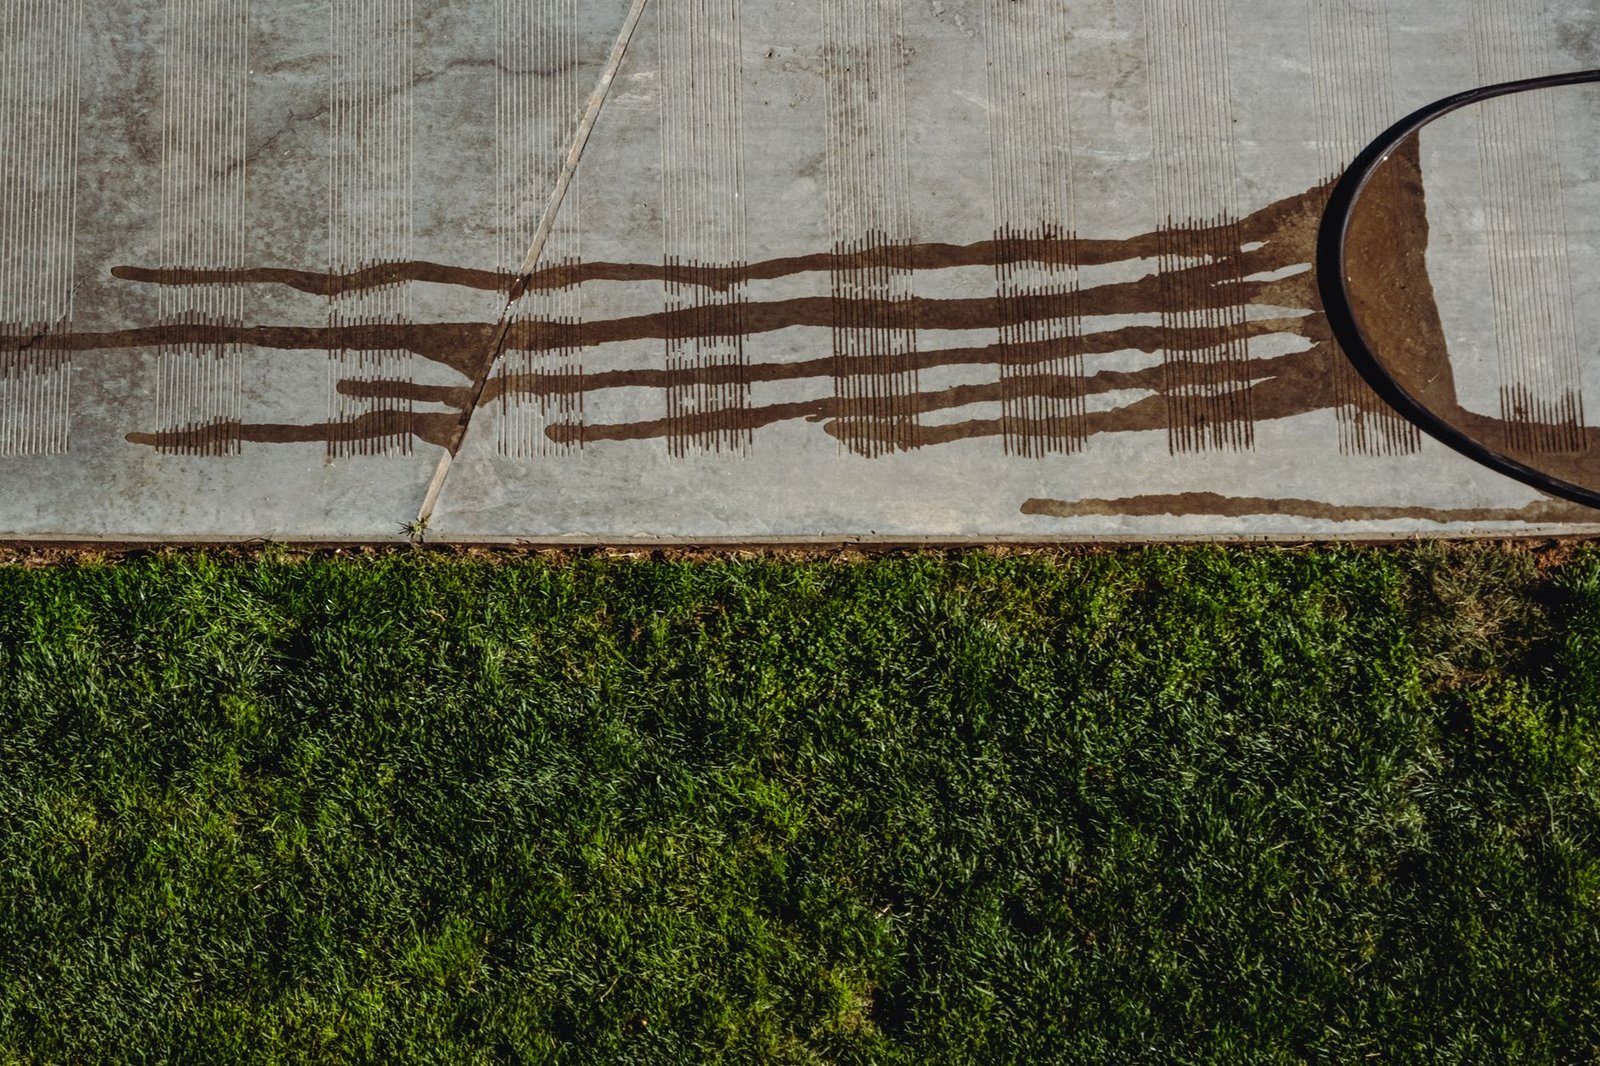
This joint is where most concrete paver borders fail, and the cause is usually mortar or adhesive. I read more forum threads about cracked mortar here than I planned to. Same story every time.
- Don't mortar the border to the slab. The slab and pavers move differently, so a rigid bond cracks within a season or two, and loose mortar chips are harder to fix than a sand joint.
- Don't glue a beside-the-slab border to the slab edge. Construction adhesive belongs between border pavers and the slab surface in an overlay, as in Family Handyman's pavers-over-concrete project. It does not belong on the vertical face of the slab.
- Butt the first row tight against the slab, leaving the same small gap as the paver joints, about 1/16 to 3/16 inch.
- Fill it with the same joint sand as the rest of the border. Polymeric sand works well here. It locks the joint, resists washout from water running off the slab, and discourages weeds and ants.
If the slab edge is rounded, the gap at the top will be wider than the others. Check the maximum joint width on the polymeric sand bag (the back of that bag is dull reading, but it is the only document that counts here). If the gap is wider than the product allows, saw-cut the slab edge square.
Pavers with a concrete border instead
Some searches for a concrete border for pavers mean the reverse: a paver field held in by a poured concrete band. That works well, because a continuous concrete curb is an excellent edge restraint.
- Pour the band first, on a compacted base, at finished paver height, then build the field inside it.
- Make it wide and deep enough to resist the push. A band roughly 6 inches wide and 6 inches deep is common on patios, with control joints every few feet so the cracks fall where you choose.
- Use a concrete haunch instead if you don't want visible concrete: a wedge of concrete against the outside of the last paver row, kept below the surface and covered with soil.
Concrete Network's list of concrete patio border ideas shows colored and stamped concrete bands used the same way around other surfaces.
Choosing a border that suits the slab
A few design rules keep the border looking deliberate:
- Proportion: a single 4-inch row looks thin around a large slab. Above about 12 × 12 feet, two or three rows (8 to 16 inches) look better balanced.
- Contrast: plain gray concrete pairs well with a warm red, brown or charcoal border. Matching the house brick or trim ties the patio to the house. (Gray on gray is a choice, rarely the intended one.)
- Paver shape: rectangular 4 × 8 or 6 × 9 pavers run straight and turn corners cleanly. Save irregular shapes for the field.
- Thickness: standard 2 3/8-inch (60 mm) patio pavers are fine for foot traffic. If a vehicle or trailer will cross the border, use 3 1/8-inch (80 mm) pavers and a deeper base.
Build the border like a small patio and leave the slab alone
A concrete patio with paver border lasts when you treat the border as its own small paver patio: compacted base, sand bed, outside edge restraint, with the slab as the inside restraint. Set the pavers flush with the concrete and carry the slab's slope through them. Fill the joint between them with sand, not mortar. Frame a slab only if it is sound and drains away from the house. If it isn't, fix it first, because a new border is a very expensive way to highlight a crack.
FAQ
Can you add pavers around an existing concrete patio?
Yes. Dig a trench beside the slab, build a compacted crushed-stone base, screed 1 inch of sand and lay the pavers flush with the concrete. Add an edge restraint on the outside. The slab holds the inside edge.
How do you match paver height to a concrete slab?
Dig the border trench to paver thickness plus 1 inch of sand plus the base depth, measured from the slab surface. Screed so the pavers sit about 1/8 inch above the slab before compaction. They settle to flush when compacted.
What goes between concrete and pavers?
The same joint sand used in the rest of the paver joints, ideally polymeric sand. Keep the gap as tight as a normal paver joint. Do not use mortar or adhesive, because the slab and the pavers move differently.
How wide should a paver border around a concrete patio be?
One row (about 4 to 6 inches) for a small patio, and two or three rows (8 to 16 inches) for slabs larger than about 12 × 12 feet. Plan in whole paver widths so the outer row needs no cutting.
Can I lay pavers on top of the concrete only around the edge?
Only if you are paving the whole slab. A border glued on top of the slab's perimeter leaves a raised lip about 1 to 2 inches high around a sunken concrete center. That traps water and trips people. For a full overlay, follow the pavers-over-concrete method.
Do pavers beside a concrete patio need a gravel base?
Yes. The border carries the same loads as any paver patio and needs 4 to 6 inches of compacted crushed stone on well-drained soil, more on clay. Pavers laid on sand or soil beside a slab sink and leave a step at the edge of the concrete.