Last Updated on September 23, 2026 by Umar Farooq
Paver driveway installation means digging out 10 to 19 inches of soil, compacting 6 to 15 inches of crushed stone base in thin lifts sized to your compactor, screeding a 1-inch bed of concrete sand, laying pavers at least 2 3/8 inches (60 mm) thick (3 1/8 inches, or 80 mm, is better) in a herringbone pattern, locking the edges with a concrete or spiked restraint, then vibrating joint sand in with a plate compactor. I've read enough driveway guides to notice they all spend three paragraphs on paver colors and one sentence on the base, which is roughly backwards. A driveway fails or survives on its base, its edges and its pattern, and each of those has to be built for a 4,000-pound car instead of a patio chair.
This guide walks through a driveway paver installation in the order a crew builds it, focusing on what's specific to driveways.
What a car asks of pavers that a patio never does

A patio carries people. A driveway carries wheel loads that roll, brake and turn, which cause three problems a patio never sees:
- Rutting. Tires press the pavers down along the same two lines every day. If the base under those lines is soft or thin, it sinks, and you get two grooves that hold water.
- Creep. Braking and turning push pavers sideways. If the pattern and edges can't resist that push, the joints open and the field slowly drifts toward the street, one commute at a time.
- Rocking and cracking. Thin or oversized units pivot under a tire, crack at the corners, or pump bedding sand out of the joints.
The fixes follow: a deeper base, thicker pavers, a pattern that interlocks in every direction, and edges that can't be pushed over. The Concrete Masonry & Hardscapes Association (CMHA, formerly ICPI) sets the minimum base for a residential driveway at 6 inches on ideal soil, against 4 inches for a patio, and most real sites need more than that minimum.
Permits, utility locates and the city apron come first
Do the paperwork before you rent a machine.
- Call 811 a few days before you dig; it's free, and the exact wait varies by state. Gas, electric, water and cable lines often run under driveways, and a skid steer bucket goes down a foot or more. Near the marks, dig by hand.
- Ask the building or public works department whether you need a driveway permit. Many towns require one for a new or widened driveway, and most control the apron, the strip between the sidewalk (or property line) and the street. Some cities require that strip to be concrete, set a maximum curb-cut width, or require an inspection of the base before the pavers go down.
- Check impervious-surface limits and stormwater rules. Some towns count a paver driveway as impervious; a permeable system may be treated differently.
- Read your HOA rules if you have them. Color, pattern and border details sometimes need approval.
Also plan the transitions. The finished pavers should sit about 1/8 to 1/4 inch above the garage slab and any drain grate, so water flows away from the door. Many installers set pavers a little high at the street edge because they settle slightly during compaction.
How deep to dig for a driveway paver base
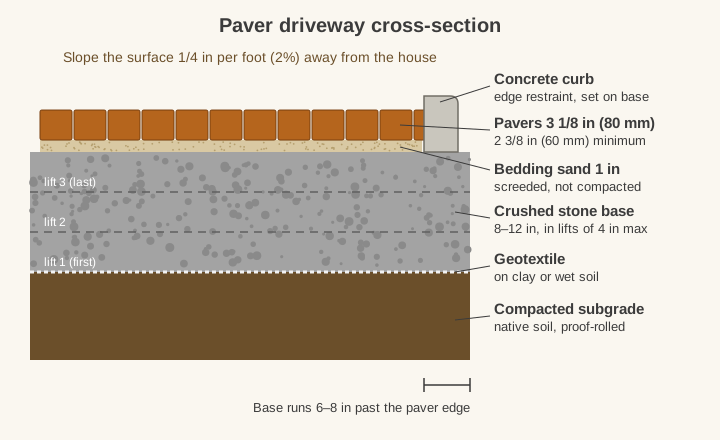
Base depth depends on your soil and climate, not on a single magic number. CMHA's rule of thumb starts at 6 inches for a residential driveway and adds 50% of that minimum for each ideal condition your site lacks. The three conditions are strong soil, good drainage and no freezing.
| Your site | Base thickness | Typical total dig (base + 1 in sand + 3 1/8 in paver) |
|---|---|---|
| Strong, well-drained soil, no frost | 6 in | about 10 in |
| One condition missing (e.g., frost) | 9 in | about 13 in |
| Two missing (e.g., frost + clay) | 12 in | about 16 in |
| All three missing | 15 in | about 19 in |
ICPI's Tech Spec 2 frames the same idea as at least 6 inches, plus 2 to 4 more for cold climates or wet, weak soil, so the two sources land in the same place. In practice, most northern driveways on clay end up at 9 to 12 inches. When in doubt, go deeper. Extra base is the cheapest insurance on this job, and the only kind sold by the ton.
A few driveway-specific excavation rules:
- Dig wider than the driveway. Unilock's driveway guide extends the base 6 to 8 inches beyond the paver edge so the edge restraint sits on compacted stone, not on loose soil.
- Cut the grade at the final slope. A driveway should fall at least 1/4 inch per foot (about 2%) away from the garage. Shape that slope into the subgrade so every layer above it has an even thickness.
- Remove all topsoil and organic material, plus any old asphalt or soft fill. Then compact the exposed subgrade. Soft spots that pump under the compactor get dug out and replaced with base stone.
- Lay geotextile on clay or wet soil. A woven fabric between the subgrade and the base keeps clay from squeezing up into the stone. That's how thick bases quietly turn into thin ones.
For the full logic of layers, lifts and drainage, see our guide to the paver base system.
Building the stone base in 4-inch lifts
This is where a DIY paver driveway succeeds or fails, and it's the one point I'll be stubborn about: one pass of the compactor over a foot of dumped stone firms the top and leaves the rest loose, and the loose part settles later, in two neat lines exactly where your tires go. The material is dense-graded crushed stone, usually sold as road base or crusher run: angular stone with enough fines to lock tight. Rounded pea gravel and plain sand don't belong in a driveway base. If you're not sure what your supplier's product is, our breakdown of paver base material compares the options.
How to build it:
- Size each lift to the compactor. ICPI allows 4 to 6 inches per lift only with a 7,000 lbf reversible plate, and it says plainly that plates in the 5,000 lbf range need thinner lifts. Cap it at 4 inches with the big plate, and 2 to 3 with a smaller rental one. Either way, a 12-inch base goes in as several lifts, not one.
- Moisten the stone. Damp aggregate compacts far better than dry dust. It should hold together when squeezed but not drip.
- Compact each lift with at least two or three passes in overlapping rows, then change direction. CMHA says a plate compactor under 5,000 lbf of force is too small for base work. For a driveway, a reversible plate compactor makes the thicker lifts much easier. Unilock specifies a minimum of three passes with a compactor delivering 10,000 lb of force for its driveway bases.
- Check grade with string lines after the final lift. The finished base should run parallel to the finished paver surface, within about 3/8 inch over 10 feet. Fix highs and lows now, in the stone. Don't fix them later with extra bedding sand.
The finished base sits one sand layer plus one paver thickness below final grade: about 4 1/8 inches for 80 mm pavers, less a little for settlement.
Edge restraint strong enough to stop a tire
Edges fail first on driveways, because tires roll right over them and wheels turn at the flare where the drive meets the street. (Every driver cuts that corner. Build as if they all will.) Pick your restraint by how often vehicles will touch that edge:
| Edge restraint | Best use on a driveway | Notes |
|---|---|---|
| Poured concrete curb or haunch | Street end, edges that tires cross, curves | Strongest option. Set on the compacted base, never on bedding sand |
| Precast concrete curb or soldier-course border set in concrete | Visible borders and straight runs | Looks finished and holds shape |
| Heavy-duty plastic or aluminum edging | Sides that only see occasional tire contact | Use long spikes. Unilock calls for 12-inch spikes on driveways |
| Existing structures (garage slab, foundation, retaining wall) | Where the pavers butt a solid structure | Already a restraint. Just seal the gap from sand loss |
Two rules apply whichever edge you pick. The restraint bears on the compacted base, which is why the base runs past the paver edge, and it goes in before you compact the pavers, or the field spreads while you compact.
Screeding a 1-inch sand bed, and nothing more
The bedding course is washed concrete sand (ASTM C33 grade, never stone dust or mason sand), screeded to a uniform 1 inch over the base. It's a setting bed, not a leveling layer. On a driveway this matters more than anywhere else. Sand thicker than about 1 inch keeps moving under tires, and that is how ruts form in the wheel paths.
Set 1-inch screed rails (steel pipe or square tubing) on the base. Fill between them, drag a straight board across to strike off the excess, then pull the rails and fill the grooves. Do not compact the sand before laying, and do not walk on it once it's screeded. Our step-by-step on screeding sand for pavers covers rail setup, void filling and the mistakes that telegraph through the finished surface.
Choosing paver thickness and pattern for vehicle loads
Thickness. Standard patio pavers are 2 3/8 inches (60 mm). That is the accepted minimum for residential driveways that carry cars and pickups. Step up to 3 1/8 inches (80 mm) when:
- the driveway carries delivery trucks, an RV, a boat trailer or a work truck,
- cars turn sharply on it or park and turn their wheels in place,
- you're in a freeze-thaw climate and want extra margin.
The price difference is modest compared with a failed driveway. Avoid large-format slabs and long plank pavers unless the manufacturer rates that exact product for vehicles. CMHA's Tech Spec 10 says pavers with an aspect ratio (length divided by thickness) of 4:1 or more shouldn't be used where vehicles drive, which is why the big square slab that looks great on the patio cracks under a pickup.
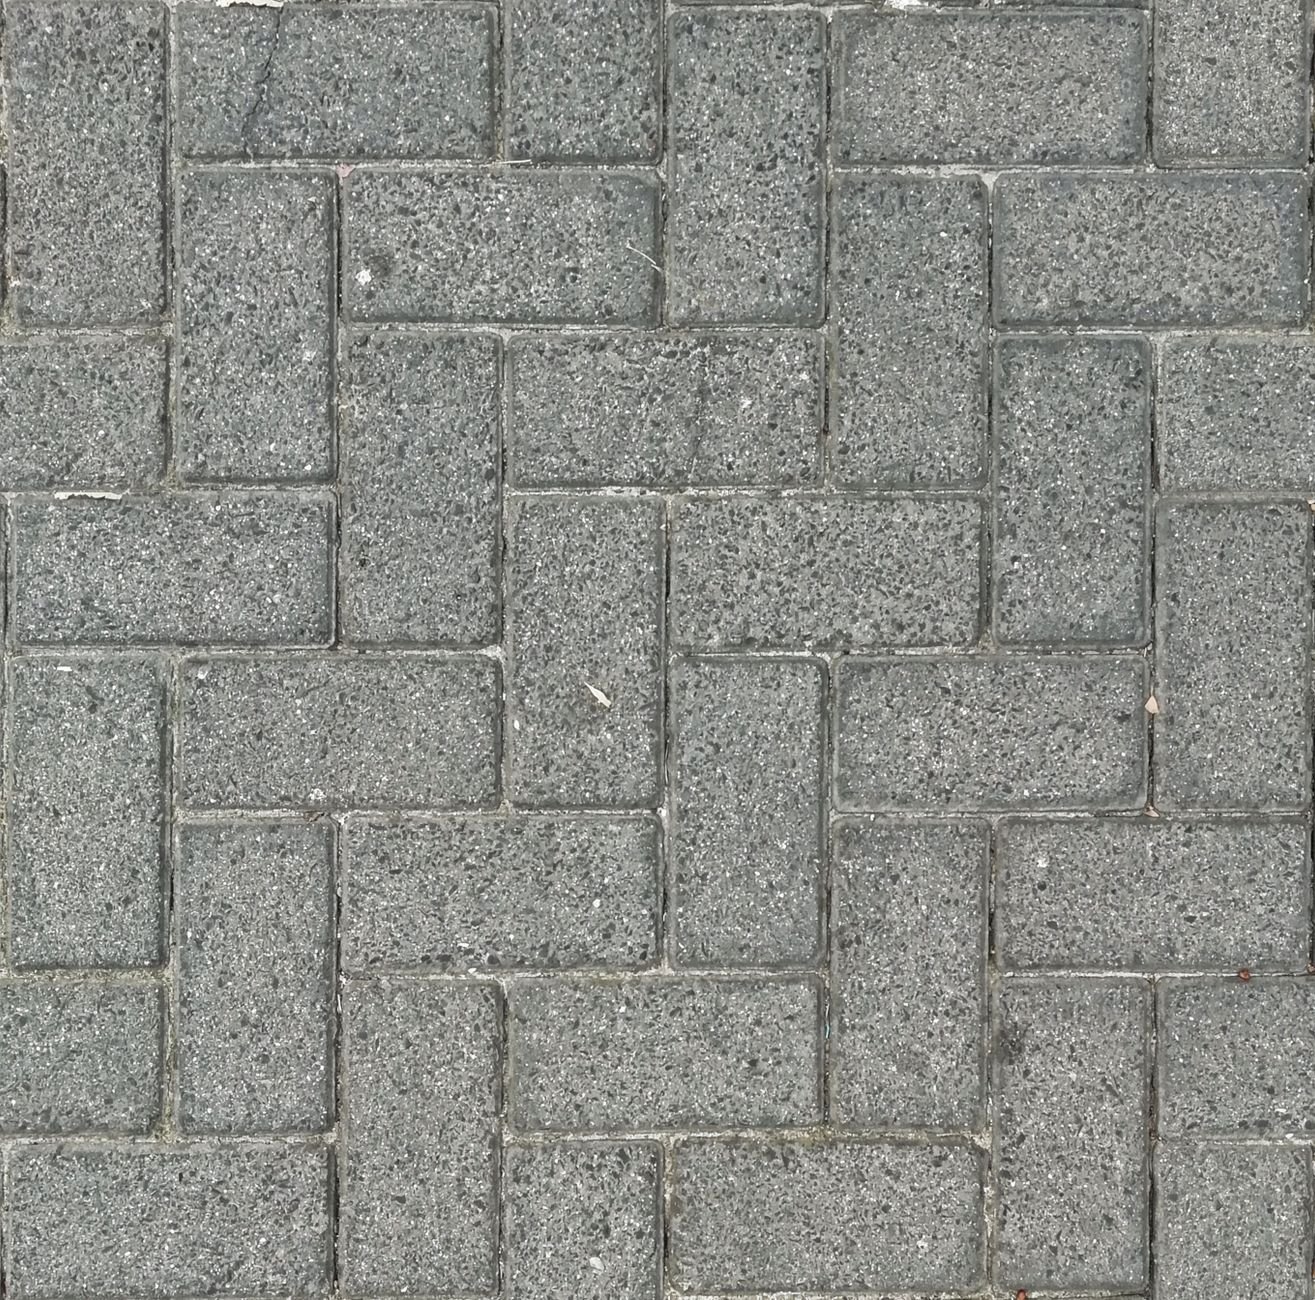
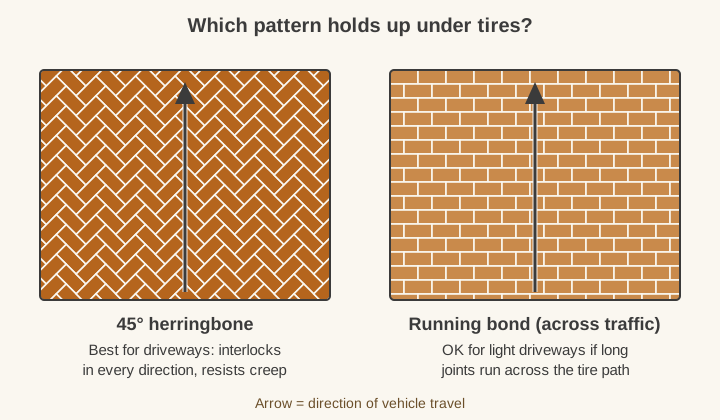
Pattern. Herringbone at 45° or 90° to the direction of travel is the strongest pattern for vehicles. Every paver is locked by its neighbors in both directions, so braking and turning forces spread through the whole field instead of sliding a row. Running bond works on light residential drives if the long joints run across the direction of travel. Stack bond and basketweave have continuous joint lines that let rows slide, so keep them out of the tire paths. Use them only as a border band, if at all.
A soldier course (a single row of pavers laid end to end) along the edges gives a clean border and a straight line for the herringbone cuts to land against.
Laying driveway pavers from a fixed edge
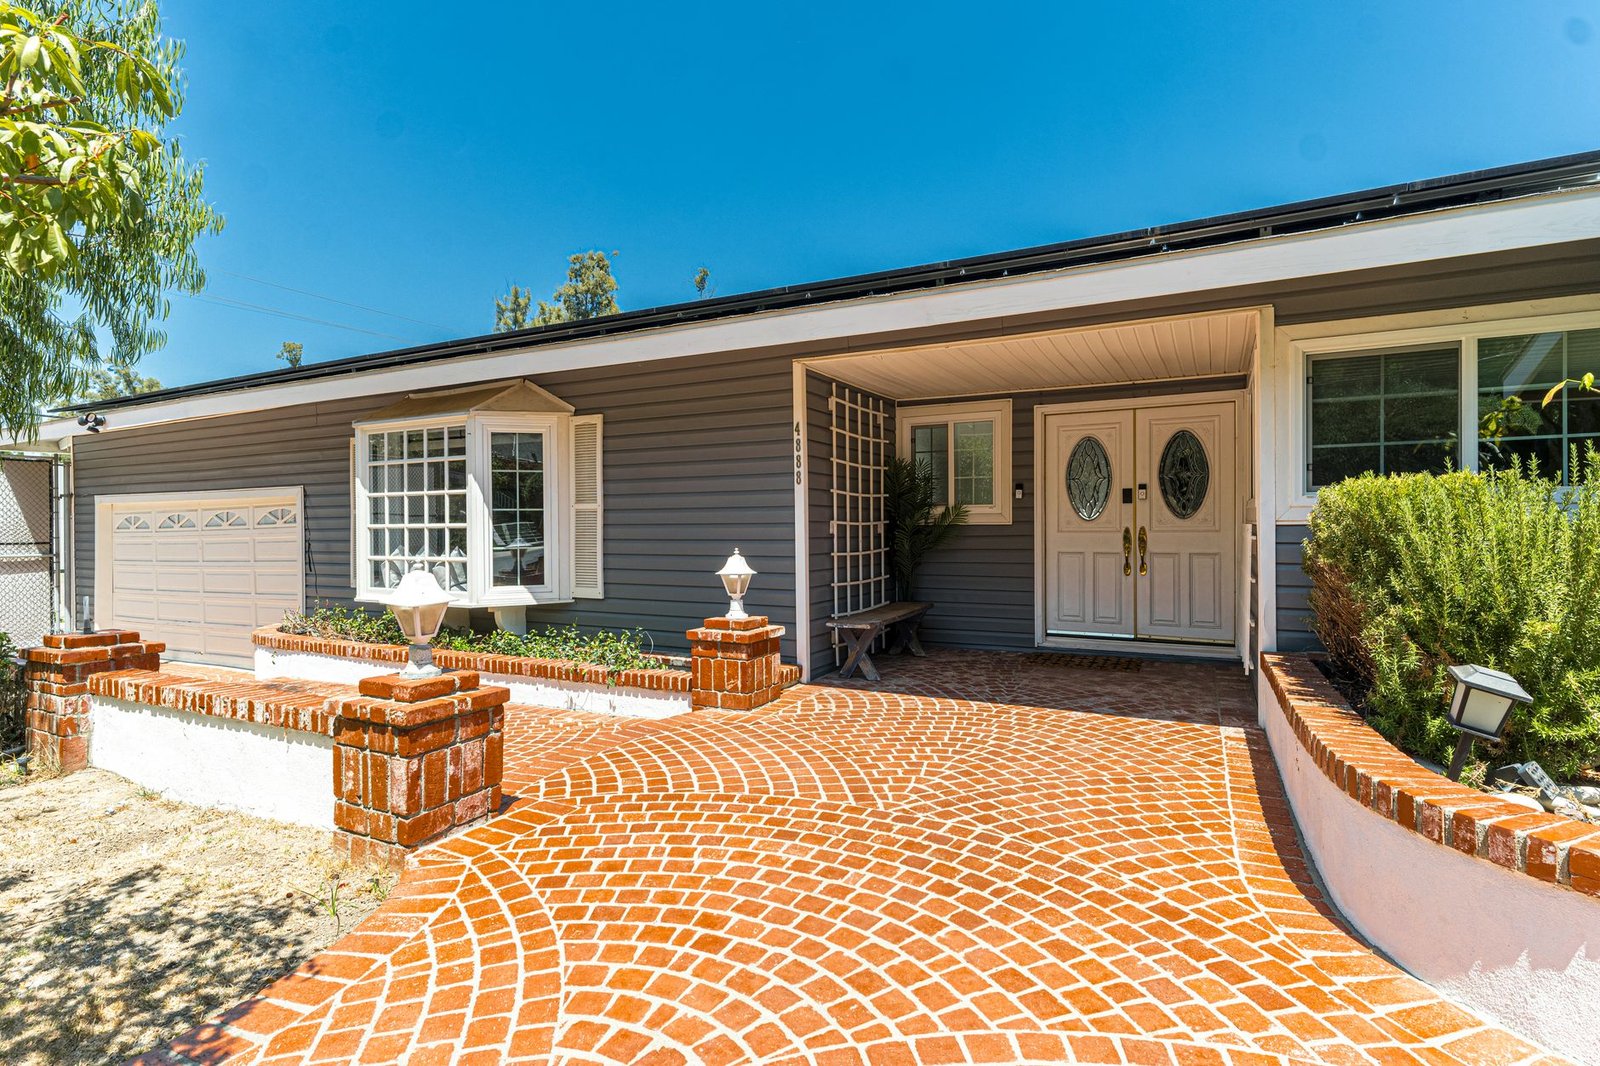
Start at the most important straight edge, usually the garage slab or a square corner, and work downhill toward the street. Set pavers straight down; sliding plows the bedding and leaves low spots.
- Snap control lines every 5 to 6 feet in both directions and check them often. Long herringbone runs wander surprisingly fast, and they never wander back on their own.
- Pull from several pallets at once. Color varies by batch, and blending avoids blotchy patches.
- Leave the built-in spacer gaps. Most pavers have spacer nubs. Pressing them tight together defeats the joint sand and invites chipped edges.
- Cut last, and cut big. Fill the field with whole units first, then cut the edges with a wet saw or a gas cut-off saw with a diamond blade. On a driveway, avoid cut slivers smaller than about one-third of a paver. Small pieces loosen and pop out under tires. Shift the layout or cut two pavers instead of leaving a sliver.
- Keep traffic off until the pavers are compacted and sanded.
Compacting, sanding and when you can drive on it
Once the pavers are laid and the edges fixed, sweep the surface clean and go over the whole driveway with the plate compactor, a urethane pad under it so it doesn't scuff the faces. Make at least two passes in different directions, working from the edges inward. This beds the pavers into the sand and pushes sand up into the bottom of the joints.
Then sweep joint sand in and compact again, repeating until the joints are full. You have two choices of joint sand:
- Regular washed joint sand can be driven on as soon as the joints are full and compacted, and it's easy to top up.
- Polymeric sand hardens after wetting and resists washout and weeds. Follow the bag's cure time before driving on it, usually a day or two in dry weather. Rain during curing can leave a haze. For the differences between bedding, joint and polymeric sand, see our guide to sand for pavers.
Check the surface with a straightedge after compaction. Any paver more than about 1/8 inch high or low gets pulled, re-bedded and re-compacted now. Driving on it won't fix it, however optimistic that feels at the end of day four.
Permeable pavers: the same driveway with different stone
This Old House's guide to a permeable paver driveway builds the same structure with open-graded stone, and it's worth knowing if your town limits impervious surfaces or you have drainage problems. The differences:
- The base is washed, open-graded stone with no fines, so water can pass through. This Old House specifies about 6 inches of larger stone topped by 4 inches of smaller stone, with a total dig of at least 15 inches.
- The bedding layer is 1/4-inch chip stone instead of sand, and the wider joints are filled with the same chip stone.
- A percolation test of the soil comes first, and the base may need an underdrain on heavy clay.
Permeable systems cost more and are harder to build well; This Old House rates the job 5 out of 5 for difficulty and recommends a contractor. They handle heavy rain very well, and need a yearly vacuum or sweep so the joints don't clog.
What a paver driveway installation costs and how long it takes
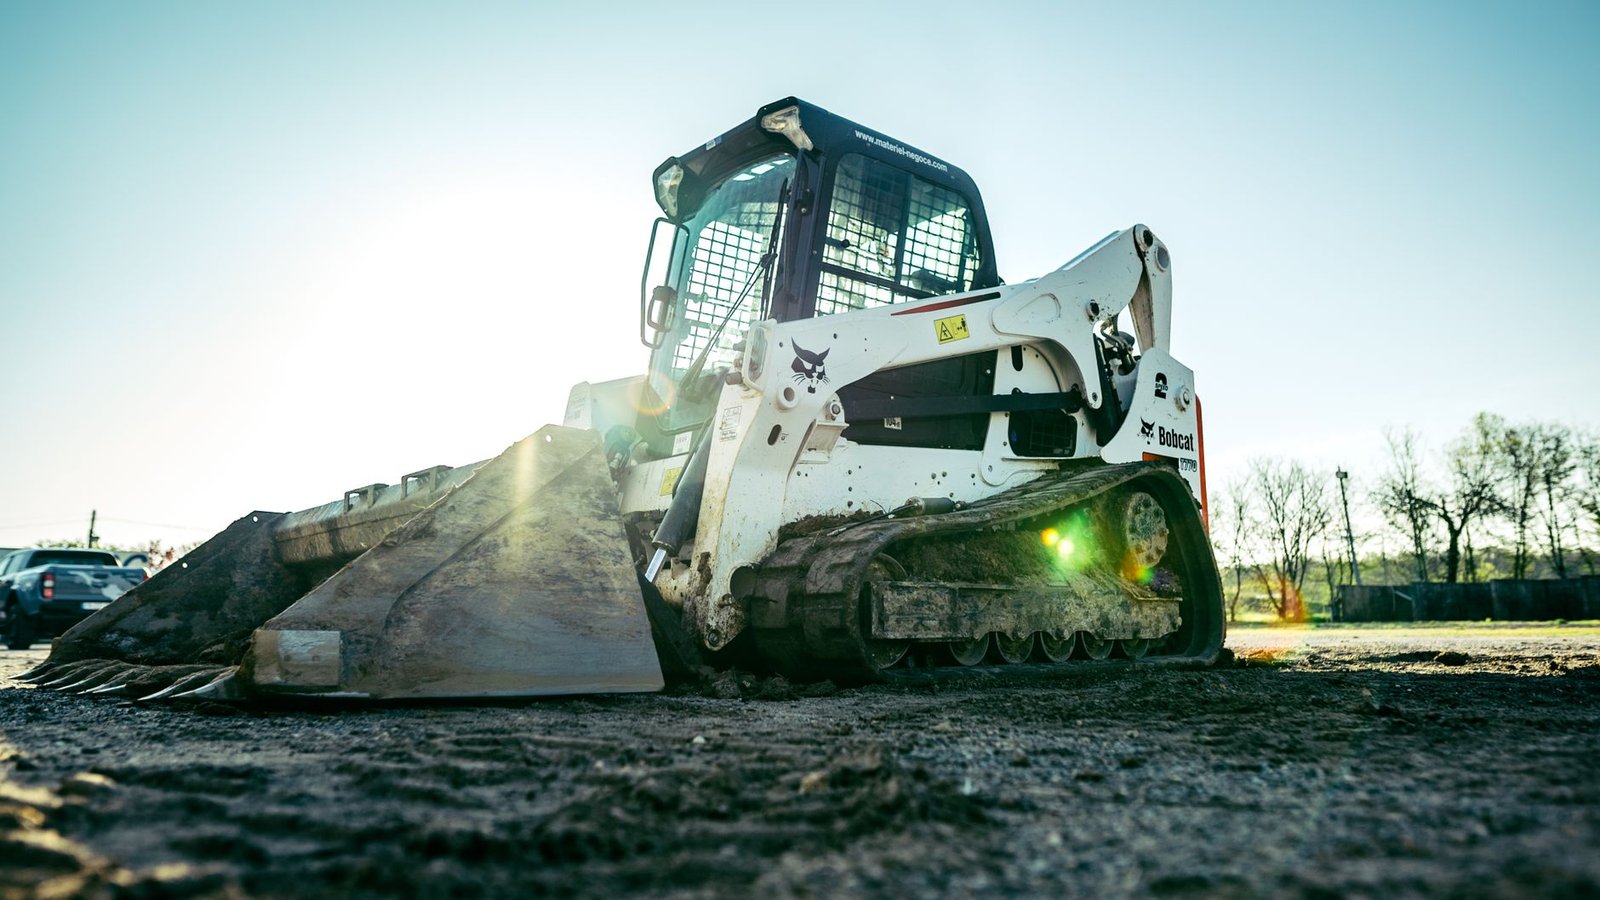
Time. A professional crew with a skid steer usually finishes a typical residential driveway in three to five days: demolition and digging, a day or more of base, then laying, cutting and compacting. A DIY driveway of the same size often takes several weekends, because moving 20-plus tons of stone with a wheelbarrow is a job in itself.
Materials for a 20 × 24 ft two-car driveway (480 sq ft), 10-inch base:
| Item | Quantity (approx.) |
|---|---|
| Excavated soil to haul away | about 21 cu yd in place (more once loose) |
| Crushed stone base, 10 in compacted | about 15 cu yd, roughly 21 to 23 tons |
| Concrete sand, 1 in bedding | about 1.5 cu yd |
| Pavers | 480 sq ft + 10% for herringbone cuts, about 530 sq ft |
| Joint sand or polymeric sand | per the manufacturer's coverage chart |
| Edge restraint | the full perimeter not bordered by structures |
Cost. Installed prices vary widely by region, access, demolition and paver choice. For permeable driveways, This Old House reports most jobs fall around $10 to $40 per square foot installed, with high-end work above that; standard pavers usually sit toward the lower part. DIY cuts out the labor but not the equipment: a skid steer or mini excavator, a large plate compactor, a wet saw, and dump fees for the soil.
DIY or hire? Laying pavers is well within reach for a careful homeowner. The part people underestimate is the base: excavating 15 to 20 cubic yards, compacting several lifts correctly, and getting a 2% slope to drain. Rent the machines rather than buying them; you need a skid steer for a few days and a heavy plate for a weekend, not for the next decade. If you can't run them, hire out the excavation and base and lay the pavers yourself. That split works well.
What ruts, sinking and gaps tell you later
A paver driveway that's going wrong gives early warnings, and each one points to a specific cause:
- Ruts in the wheel paths: sand bed too thick, or base too thin or poorly compacted for the soil.
- A sunken area near a downspout or the garage edge: water getting into the base. Redirect the water, then lift the pavers, rebuild the base and re-lay.
- Joints opening along an edge: the edge restraint is moving or missing. Reset or upgrade it, usually to concrete.
- Pavers creeping toward the street: weak pattern or no restraint at the street end.
- Individual pavers rocking: small cut pieces or a void in the bedding. Pull them, re-bed and re-compact.
The good news is that pavers can be lifted and relaid with no patch marks. That's one real advantage over poured concrete.
Build the base for a truck, not for the car you own
The pavers on a driveway get all the attention, but the base does the work. Size it for your worst soil and your heaviest likely vehicle, compact it in lifts your plate can actually handle, keep the sand at 1 inch, choose 60 mm pavers at minimum (80 mm if trucks are involved), lay them in herringbone, and pin every edge to the base. Do that and a paver driveway installation will outlast the house's next two roofs. And if the stone truck is already backing up the street while you read this, ask the driver to dump it near the garage end. You'll be moving it one lift at a time, and every yard of wheelbarrow you save is one your back won't mention later.
FAQ
How deep should the base be for a paver driveway?
A 6-inch minimum of compacted crushed stone on strong, well-drained soil where the ground doesn't freeze. Most driveways need 9 to 12 inches, and 15 inches on weak, wet, freezing soil. That follows CMHA's guidance of adding 50% for each ideal condition your site lacks. Add 1 inch for bedding sand and the paver thickness to get the total dig.
How thick should driveway pavers be?
2 3/8 inches (60 mm) is the minimum for residential driveways carrying cars and pickups. Choose 3 1/8 inches (80 mm) for heavier vehicles, tight turning areas or extra durability in freeze-thaw climates.
Can I install a paver driveway myself?
Yes, if you can rent and operate a skid steer or mini excavator and a heavy plate compactor, and you're prepared to move 20 tons or more of stone. Many homeowners hire out the excavation and base, then lay and compact the pavers themselves.
What is the best pattern for a paver driveway?
Herringbone, laid at 45° or 90° to the direction of travel, because each paver is locked in both directions and resists the sideways push of braking and turning tires. Running bond laid across the direction of travel is acceptable for light residential use.
How soon can you drive on a new paver driveway?
With regular joint sand, as soon as the pavers are compacted and the joints are full. With polymeric sand, wait for the cure time on the bag, typically 24 to 48 hours of dry weather.
Do I need a permit to install a paver driveway?
Often, yes. Many towns require a permit for new or widened driveways and control the apron between the sidewalk and the street. Check with your building or public works department, and always call 811 before digging.