Last Updated on September 23, 2026 by Umar Farooq
A paver border is a row, or several rows, of pavers laid around the edge of a patio, walkway or driveway in a different orientation, size or color from the main field. It is the picture frame, and like most frames it quietly hides the bits where the picture went wrong. The two standard layouts are the soldier course, with pavers set side by side and perpendicular to the edge, and the sailor course, with pavers set end to end along it. A border frames the design and gives the cut field pieces a solid row to lock against. It does not hold the pavers in by itself, so an edge restraint still goes behind it.
Below: designing a paver border (courses, colors, double borders, ideas) and laying the row cleanly. For the buried restraint that holds it all in place, see our guide to paver edging.
What a paver border does besides looking good
Most people add a border for looks, fair enough. It also solves a practical problem.
Any pattern other than a plain grid leaves cut pieces at the edge. With herringbone, every edge paver is cut at an angle, and some pieces end up small. Small pieces rock, crack and work loose, usually in the spot where someone puts a chair leg. Unilock's explainer on understanding paver borders describes the border as structural reinforcement for those trimmed field pieces. The field gets cut to a clean line, and full-size border pavers run along the outside where the loads are highest.
A border also:
- Hides imperfect cuts. A straight border makes a slightly wavy field cut far less obvious.
- Marks edges and changes of level. A contrasting border at steps, pool edges and raised-patio drop-offs makes the edge easier to see.
- Guides people. A border along a walkway shows where the path is, even at dusk.
- Breaks up big areas. Bands of border pavers split a large patio into zones, so it reads as designed.
Soldier course or sailor course?
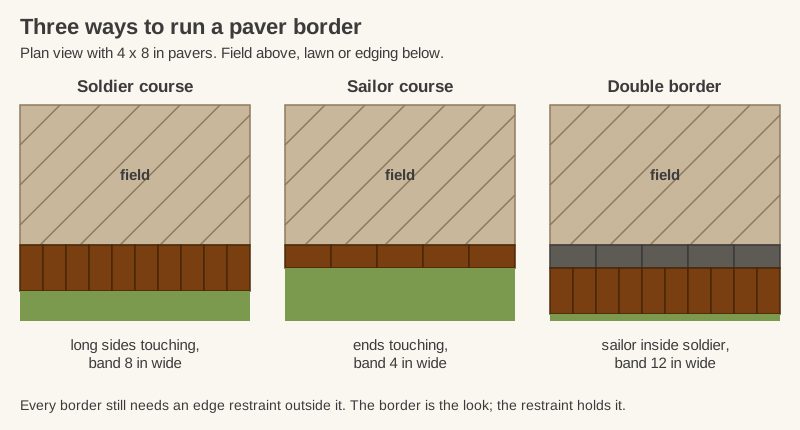
These two terms cover almost every paver border you will see, and I spent an embarrassing amount of time mixing them up before I found a way to remember them. How to Hardscape's soldier vs sailor comparison gives the easy way to remember them: soldiers stand shoulder to shoulder, sailors stand front to back.
| Soldier course | Sailor course | |
|---|---|---|
| How pavers are set | Long sides touching, perpendicular to the edge | Short ends touching, running along the edge |
| Band width with a 4 x 8 in paver | 8 in | 4 in |
| Visual weight | Strong, formal frame | Slim, subtle line |
| Pavers per foot of edge | About 3 | About 1.5 |
| Works with mixed-length pavers? | No, every paver must be the same length | Yes, lengths can vary along the run |
| Suits | Patios, driveways, large areas | Walkways, small patios, curves |
The soldier course is the most common paver border. Western Interlock's guide to designing a paver border calls it the most common border treatment. It reads clearly from across a yard and is strong at the edge, because each paver's long axis points into the field.
The sailor course uses half as many pavers per foot and draws a thinner line. It is the better choice where a wide band would overpower the space, such as a 3-foot walkway, where an 8-inch soldier course on each side would take up more than a third of the width.
The square course is a third option: a row of square pavers around the field. It sits visually between the two and suits patios laid in square-and-rectangle patterns.
Double borders and inlay bands
Once you have one border row, adding a second is the easiest way to make a patio look custom.
- Sailor inside soldier. A widely used double border: a slim sailor row next to the field, then a soldier row outside it. Using two colors, such as a charcoal sailor and a tan soldier, gives a picture-frame effect.
- Two soldier rows. Heavier and more formal, and suited to large patios and driveways.
- Inlay bands. Border pavers do not have to stay at the edge. A band of soldier-course pavers running across a big patio divides the dining area from the lounge, or marks where a walkway joins the patio.
- Borders around features. A ring of border pavers around a fire pit, a tree or a drain grate makes the feature look planned instead of cut around.
Keep it in proportion. Unilock mentions double and even triple borders, but on a small patio every extra band shrinks the field and adds cuts. (A triple border on a bistro patio is mostly border with a patio rumor in the middle.) A double border suits patios above roughly 200 square feet; below that, one row usually looks better.
Choosing a border color: match, contrast or blend
Western Interlock sorts border colors into two approaches, and they are the right place to start.
- Consistent (matching) borders use the same color as the field and rely on the change in orientation for the effect. They look calm and suit patios next to busy planting or a patterned house facade.
- Contrasting borders use a different color, often a minority color already in a blended field paver, such as a tan-and-gray field with a solid charcoal border. The border picks up a tone the eye already sees, so it looks deliberate.
A few color rules that rarely fail:
- Go darker at the edge. A darker border grounds the patio and hides dirt kicked up from the lawn, which the lawn supplies free of charge.
- Pull from the house. Match the border to the roof, window trim or stone veneer rather than introducing a new color.
- Keep texture consistent unless you mean it. A smooth border around a tumbled field can look like a mismatch rather than a design.
- Check the stones in daylight. Colors vary between production runs and change wet and dry. Lay a few border and field pavers together before ordering.
Paver patio border ideas worth copying
- Charcoal soldier course around a light field. A dependable paver patio border: it frames the field without fuss and hides lawn dirt.
- Border that continues into steps. Run the border color onto the step treads or coping so the patio and steps read as one piece.
- Contrasting band at the house. A border row along the foundation separates the patio from the wall and hides the gap left for flashing.
- Border that becomes a path. Let the soldier course peel off and run through the lawn as a walkway edge.
- Square course around a large-format field. Suits modern slab-style pavers, where a soldier course of long, thin units might look busy.
- Different paver, same color. A cobble-textured border around a smooth field adds interest without changing the color scheme.
Laying a border row, start to finish

The border pavers go in the same sand bed as the field, and this is where I'll be stubborn: that bed is one inch of concrete sand meeting ASTM C33, screeded flat and left loose until the pavers are on it (ICPI Tech Spec 2). Not stone dust, not mason sand, and never a leveling layer. Two inches of sand in a low spot compresses more than one inch elsewhere, and a border, being a straight line, shows the dip first. What changes for the border is only the order of work and where you cut. The full patio sequence, from digging to joint sand, is in our paver installation guide.
Method 1: field first, border last (most common).
- Lay the field past the finished edge. Run the field pavers a little beyond where the border will start.
- Mark the cut line. Measure in from the finished edge by the border width plus a joint, and snap a chalk line or set a straightedge across the laid field.
- Cut the field on the line. Cut in place with a saw or remove and cut each paver. Keep cuts clean and straight, because the border will show every wobble.
- Lay the border row tight against the cut field, full-size pavers only, in the course you chose.
- Install the edge restraint against the outside of the border, spiked into the base.
- Compact and sand the whole surface together, border and field, then sweep in joint sand.
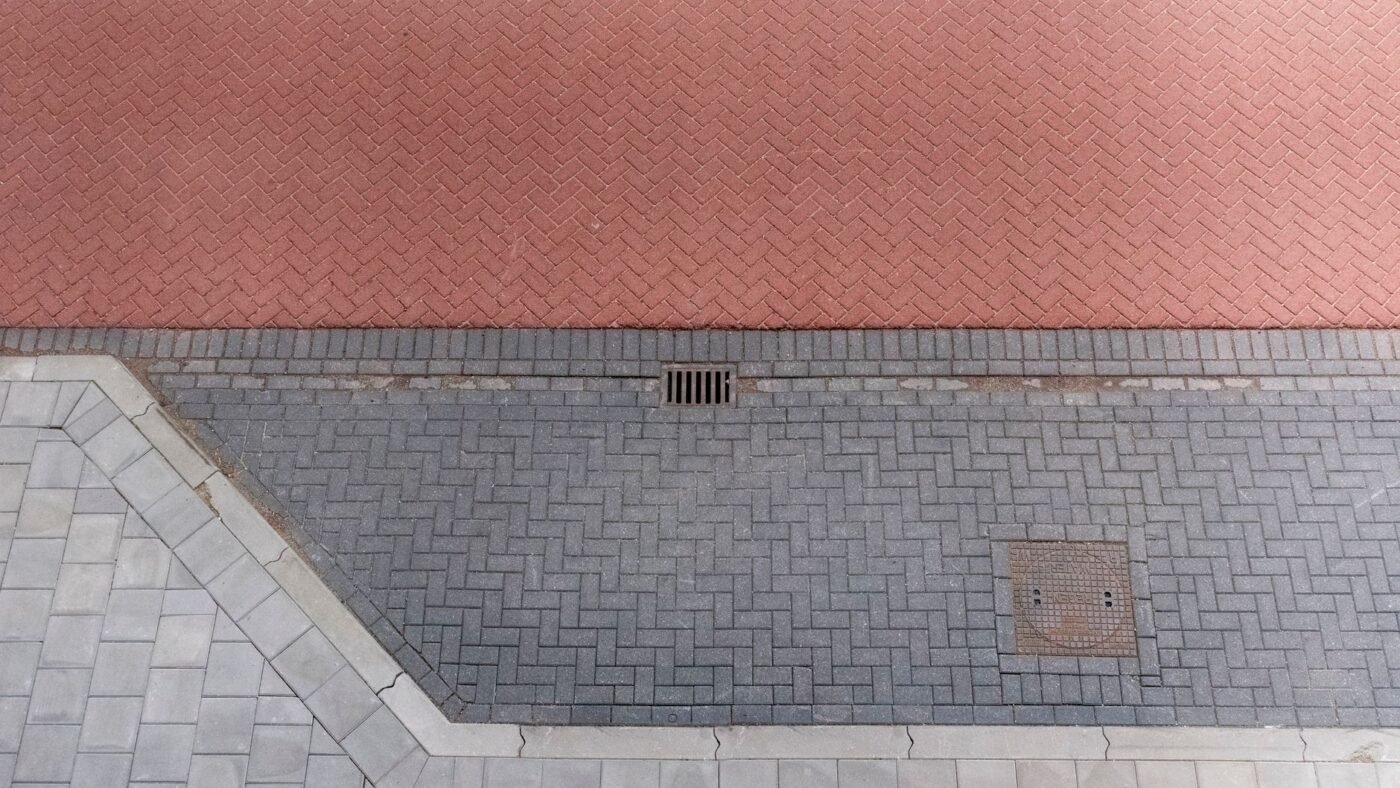
Method 2: border first. On straight runs, some installers lay the border first along a string line and fill the field against it, as the setters in the photo above are doing. It gives a perfectly straight edge but forces every field cut to be made one by one.
Rules that apply either way:
- Avoid slivers in the field. If the last field piece would be under a third of a paver's size, shift the pattern or change the border width slightly rather than cutting a tiny piece.
- Keep border joints aligned. Check the border with a string every few feet; a soldier course that drifts off square looks worse than a sailor course.
- Don't cut border pavers except at corners. The border is where full pavers belong.
Running a border around curves
Curves are where the sailor course shines. Pavers set end to end follow a curve with small, even wedge-shaped joints, and mixed lengths do not matter.
I looked for a documented limit on how tight a soldier curve can go and found only opinions, so here is the mechanism instead.
A soldier course can follow a curve, but the joints open into wedges on the outside of the bend. On gentle curves, fine. On tight curves, either use small square pavers, which turn more easily, or cut each soldier paver slightly tapered so the joints stay even.
For curves, field-first is easier. Lay the field past the curve, mark the arc with a garden hose, cut the field to it, and lay the border against the cut. Then bend the edge restraint around the outside.
Fit the border to the size of the space
As a rough guide to scale:
- Walkways under about 4 feet wide: a single sailor course, or no border at all.
- Patios up to about 200 square feet: a single soldier course.
- Large patios and driveways: a soldier course, a double border, or inlay bands to break up the area.
A border is not the same as edging the lawn or a flower bed with pavers. If you want a row of pavers or stones as a mowing strip or bed edge, see our guide to paver edging stones.
Choose the border for scale, and lay it against a clean cut
A good paver border starts with the right course: soldier for strength and presence, sailor for narrow paths and curves, a double border only where the patio is big enough to carry it. Pick a color that matches the field or a tone already in it, and go darker at the edge. Then lay the field first, cut it to a straight or smooth line, and set full border pavers against the cut with a real restraint behind them. Get that cut clean and the border looks intentional. Get it wrong, and at least you'll know exactly which chalk line to blame.
FAQ
What is the difference between a soldier and a sailor course?
In a soldier course, pavers stand side by side with their long sides touching, perpendicular to the edge, making a wider band. In a sailor course, pavers run end to end along the edge, making a narrower band. With a 4 x 8 inch paver, a soldier course is 8 inches wide and a sailor course is 4 inches.
Does a paver border need edge restraint?
Yes. A border is part of the paver surface, so it can move outward like any other row. Install plastic, aluminum or concrete edge restraint against the outside of the border, spiked into the compacted base.
Should a paver border be laid first or last?
Most installers lay the field first, cut it to a chalk line, and lay the border last against the clean cut. Laying the border first along a string works on straight runs, but every field paver then has to be cut to fit against it.
How wide should a paver border be?
A single sailor course of standard 4 x 8 inch pavers is about 4 inches wide, and a single soldier course is about 8 inches. Double borders run about 12 inches or more. Keep narrow walkways to a sailor course so the border does not take over the path.
Should a paver border be a different color?
It doesn't have to be. A matching border relies on the change in direction and looks calm. A contrasting border, often darker or picking up a minority color from a blended field paver, frames the patio more strongly. Both work; pick the one that suits the house and garden.
Do paver borders need to be set in concrete?
Not on patios and walkways. The border sits in the same sand bed as the field, held by an edge restraint. Along driveways, where tires run over the edge, borders are often set on a concrete bed or backed by a concrete haunch for extra strength.