Last Updated on September 23, 2026 by Umar Farooq
Paver patio repair is usually a small, local job, because interlocking pavers come apart one at a time, which is more than you can say for a slab. To fix a broken paver, lift it out, level the sand underneath, drop in a match and re-sand the joints. To fix gaps, clean out and refill the joints, and reset the edge restraint if the pavers have crept outward. To fix a dropped edge, lift the outer rows and rebuild the support under them. Nothing needs a jackhammer, and you can reuse the pavers you lift.
That is also my one strong opinion on repairs: most paver problems are local and fixable, and most "rip it all out" advice is sales. The one rule is to find out why the problem happened first. A cracked paver from a dropped planter is a one-off. A row of cracked pavers along a driveway edge is a base or edge problem, and a new paver will crack the same way.
Paver patio repair starts with what you see
| What you see | Likely cause | Repair |
|---|---|---|
| One cracked or chipped paver | Impact, or a point load such as a car jack or a heavy planter foot | Replace that paver |
| Several cracked pavers in a line or wheel path | Base too thin or soft for the load | Lift the area and rebuild the base |
| Joints open, sand missing, weeds | Sand washed or blown out | Clean out and re-sand the joints |
| Gaps widening toward one edge | Edge restraint loose, missing or sitting on sand | Reset the edge and tighten the field |
| Outer row tilting down | No base under the edge, or spikes pulled out | Rebuild the edge (below) |
| Dip in the middle that holds water | Base settlement, washout or soft soil | See the sunken-paver section below |
| Faded, stained, weedy, but flat | Age and neglect, not structure | Restoration: clean, re-sand, seal |
Paver repair tools to gather first
Most repairs need only hand tools, several of which are already in your garage pretending to be something else:
- Paver extractor or two flat-bladed screwdrivers. An extractor lifts straight up; two long screwdrivers, one each side, also work.
- Small pry bar for pavers that are locked tight by polymeric sand.
- Rubber or white non-marking mallet. Black rubber can leave marks on light pavers.
- 4-foot level or straight 2×4 to check the repair against its neighbors.
- Trowel and a short screed board for leveling bedding sand in a small patch.
- Hand tamper for base stone in small holes.
- Stiff broom, leaf blower and shop vac for cleaning out joints.
- Hammer and cold chisel to break out a paver that won't lift, plus safety glasses and gloves.
- Materials: ASTM C33 concrete sand for bedding (not stone dust or mason sand, which the CMHA spec rules out by name), joint sand to match, crushed base stone for anything deeper, and replacement pavers.
Replacing a broken or cracked paver
- Clear the joints. Scrape the joint sand out with a putty knife or old screwdriver. Wet polymeric sand to work it loose, or cut it out.
- Lift the paver. Lever it up with two screwdrivers in opposite joints, or an extractor. The first paver is always the stubborn one. If it is locked, break it up with a chisel from the center outward so you don't chip its neighbors.
- Check the sand bed. It should be about an inch of level concrete sand. Scrape out lumps, add sand if low, and strike it off with a short board resting on the neighboring sand.
- Set the new paver slightly proud. It should sit about 1/8 inch above its neighbors, because it will settle when you tap it and when the joint sand works in.
- Tap it down with the mallet, through a scrap of wood if you're worried about marks. Check with a level across the neighbors.
- Re-sand the joints until full. Water polymeric sand in according to the bag.
Finding a match. Take the broken paver to a dealer to match maker, color and size, or use leftovers from the original job. A new paver looks brighter than its weathered neighbours at first, like the new kid on the first day; if that bothers you, swap it with one hidden under a grill or planter.
Closing gaps between pavers
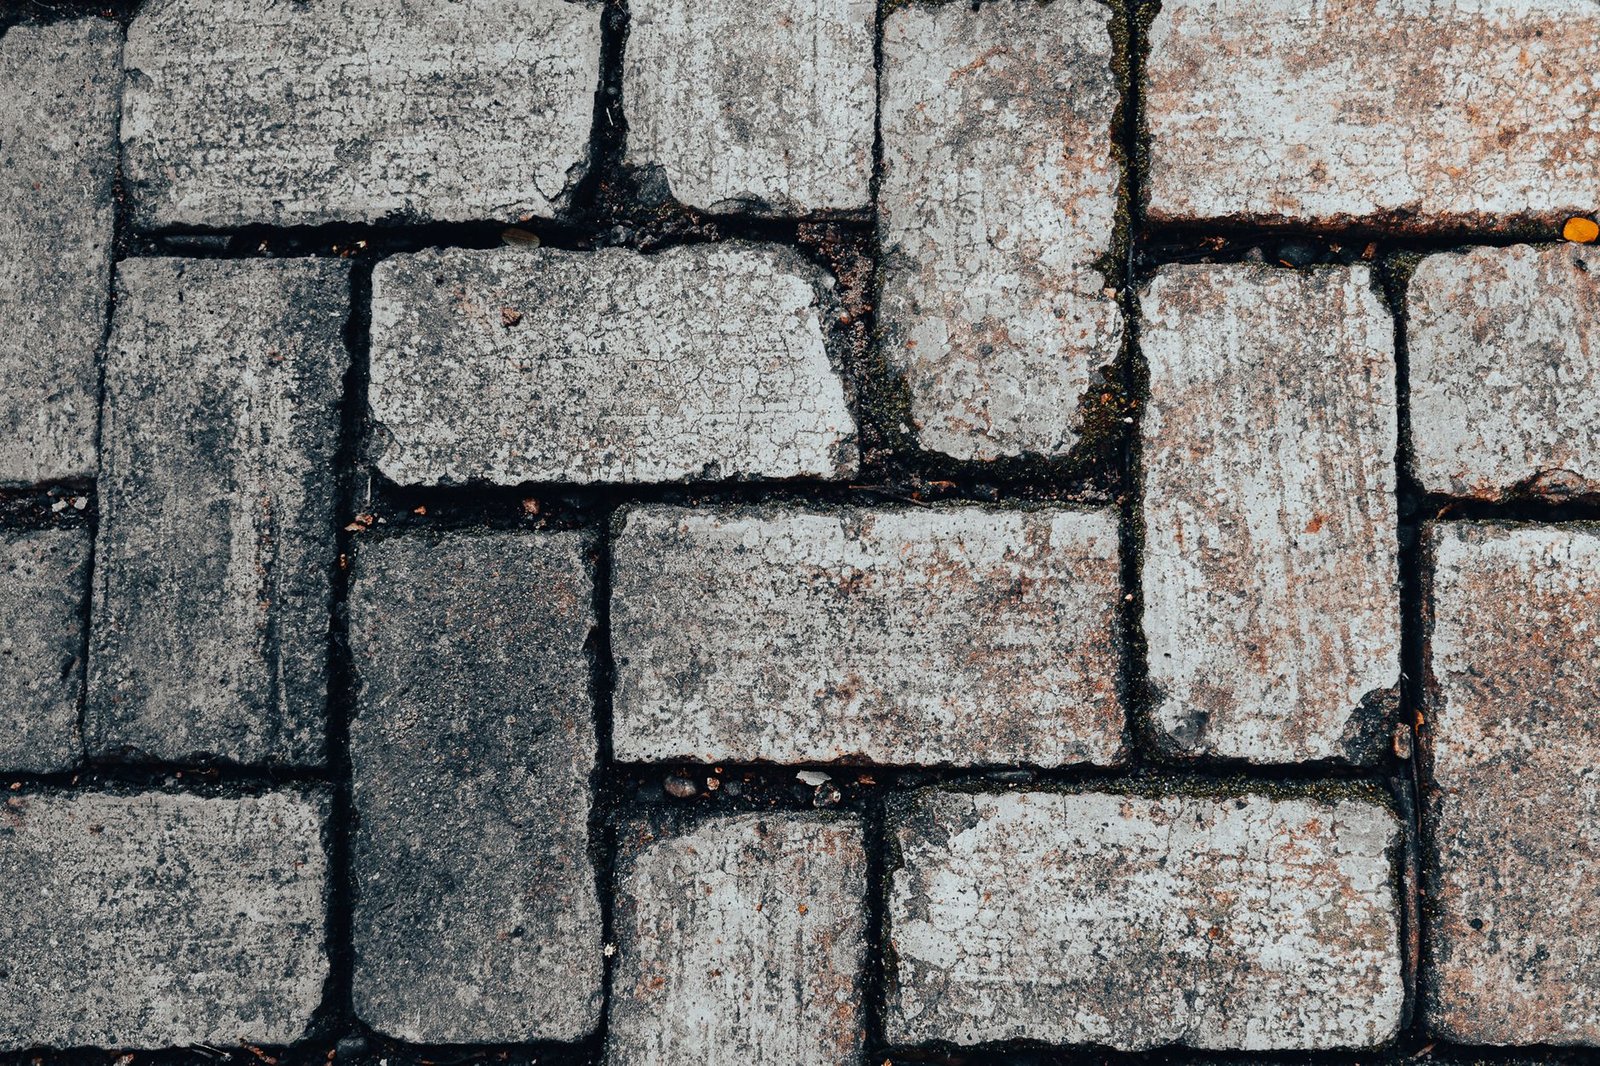
Gaps come in two kinds.
Joints that have emptied out are a sand problem. The pavers haven't moved; the sand has. Blow and brush out the old sand, dirt and weeds (a shop vac helps) to at least an inch for regular sand, or 1 1/2 inches for polymeric, which is the minimum joint depth on both polymeric data sheets I read. For regular sand, sweep it in dry, run a padded plate compactor over it, then top up. For polymeric sand, follow the bag closely: bone-dry surface, compacted in, watered in correctly, or it hazes or washes out. (The bag is not being dramatic. The bag has seen things.)
Joints that keep getting wider are an edge problem. Nothing holds the perimeter, and an unrestrained field drifts toward the lawn one sixteenth of an inch at a time. More sand won't help. Instead:
- Lift the outer row or two along the edge that has moved.
- Push the field back tight, working from the far side with a mallet and a block of wood.
- Reset or replace the edge restraint so it holds the pavers tight.
- Relay the edge pavers, cutting new edge pieces if the field is now a little narrower.
- Re-sand all the joints you disturbed.
Re-leveling a paver patio edge that has dropped
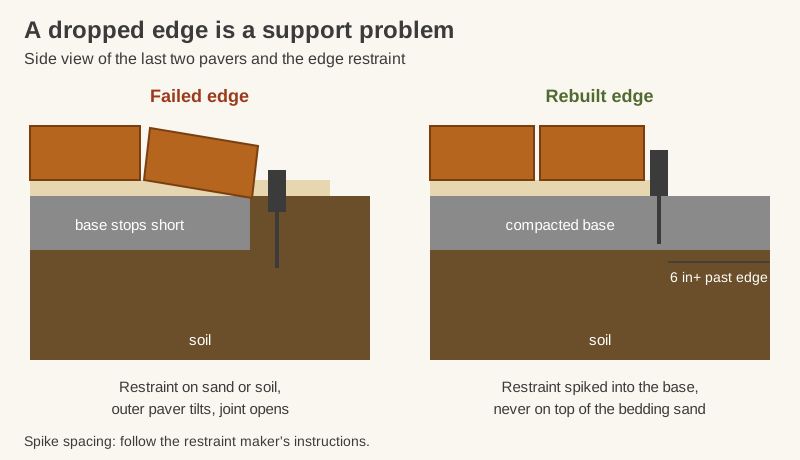
A dropped or rolled edge is a common structural patio paver repair, and it usually comes from missing support under the outer row. The CMHA's technical note on edge restraints is one of the few industry documents I've read that doesn't hedge once: restraints never go on top of the bedding sand. They belong on compacted base, and the base extends past them. If the base stopped at the paver line, the edge had nothing to sit on.
Western Interlock's failed-edge walkthrough shows a typical case: twice the bedding sand it needed, and a restraint knocked loose by equipment. The fix:
- Lift the pavers along the dropped edge, back to where they are sound. Stack them in order.
- Remove the old restraint and scrape out the bedding sand.
- Extend the base. Dig along the outside, add crushed base stone, and compact it with a hand tamper in thin layers until it is level with the existing base. The CMHA spec wants the distance from the restraint spikes to the base edge to equal the base thickness, up to 10 inches.
- Screed a fresh 1-inch bed of loose ASTM C33 sand over the repaired base.
- Relay the pavers in their original pattern, tight to their neighbors.
- Install the restraint on the base, tight against the pavers, and spike it at the spacing the manufacturer specifies.
- Compact and re-sand. Tap or plate-compact the pavers into the bed and sweep joint sand in.
Sunken spots in the field, briefly
A low spot mid-patio is a different job. Something underneath has settled or washed out: loose base, thick bedding sand, a downspout, organic soil or a backfilled trench. The pavers come up, the cause gets found, and the base is rebuilt to the right depth before they go back. Our step-by-step guide on how to fix sunken pavers covers diagnosis, lifting and rebuilding the base.
Paver patio restoration: clean, re-sand, seal
When the patio is flat and sound but looks tired (faded color, stains, weedy joints, patchy sealer), restoration brings it back without lifting anything, in this order:
- Repair first. Replace broken pavers and fix edges before you clean, or you'll clean twice.
- Deep clean. Treat stains with paver-specific cleaners, then wash the surface. Most restorations use a pressure washer here to strip out old joint material, which is why the joints must be refilled afterward. Our guide to power washing pavers covers pressure, tips and technique.
- Let it dry completely. Polymeric sand especially needs joints dry to full depth. Allow at least a full dry day, longer in cool or humid weather.
- Re-sand the joints. Refill with regular or polymeric sand and compact it in.
- Seal (optional). Wait for the sealer's own minimum after polymeric sand (Techniseal's natural-look sealer says 30 days), then apply. A joint-stabilizing sealer helps hold the new sand.
Repair, restore or rebuild?
- Repair when the damage is local: a few broken pavers, one edge, one sunken spot.
- Restore when the surface is flat and stable but looks worn.
- Rebuild when settling is widespread, water pools across large areas, or repairs keep failing in new places. Then a full lift-and-relay, reusing the sound pavers, is the honest answer.
Call a hardscape contractor for work next to a foundation, over utilities, on driveways carrying heavy vehicles, or where drainage is sending water under the house.
Fix the cause, and the patio repair stays fixed
A good paver patio repair is mostly detective work. A cracked paver, open joint or dropped edge tells you what failed underneath. Fix that, and the repair will outlast the rest of the patio. Skip it, and you'll be doing the same repair next spring. Once it's fixed, a simple paver maintenance routine keeps it that way. And the pavers you stacked in order on the lawn go back exactly where they came from, which is the most satisfying jigsaw you'll do all year.
FAQ
Can you replace just one paver?
Yes. Interlocking pavers are designed to be lifted individually. Clear the joint sand around it, lever it out with two screwdrivers or a paver extractor, level the sand bed, set the new paver slightly high, tap it down and re-sand the joints.
How do you fix gaps between pavers?
If the pavers haven't moved and the joints have simply emptied, clean them out and refill them with joint sand or polymeric sand. If the gaps keep widening toward an edge, the edge restraint has failed. Lift the outer rows, push the field tight, reset the restraint on compacted base and re-sand.
Can a paver patio be re-leveled without replacing it?
Usually, yes. The existing pavers can be lifted, the base or bedding sand corrected, and the same pavers relaid. Only broken units need replacing. The exception is a patio built on a base so thin or soft that the whole area needs rebuilding.
Should I use polymeric sand after a paver repair?
Match whatever the rest of the patio uses. If it has polymeric sand, use polymeric sand in the repaired joints so they look and perform the same. If it has regular joint sand, regular sand is fine, or you can switch the whole patio to polymeric sand during a restoration.
What tools do I need to repair pavers?
A paver extractor or two flat screwdrivers, a small pry bar, a rubber mallet, a level or straight 2×4, a trowel, a hand tamper, a broom, bedding sand and joint sand. Add a cold chisel and safety glasses for breaking out stuck pavers, and rent a plate compactor for larger areas.