Last Updated on September 23, 2026 by Umar Farooq
Compacting pavers is where a neat arrangement of blocks becomes a pavement. It is the last structural step: once the pavers are on screeded sand and the edge restraint is in, you run a padded plate compactor over the surface. That vibrates each paver into the bedding sand and pushes sand up into the joints. Make one or two passes before sweeping in joint sand, then sweep sand in and compact again, repeating until the joints are full. Stay about 6 feet back from any edge that isn't restrained yet.
Skip it and the pavers sit on the sand instead of in it. They rock, the joints never fill to the bottom, and the patio clicks underfoot like a keyboard.
What the compactor does to laid pavers
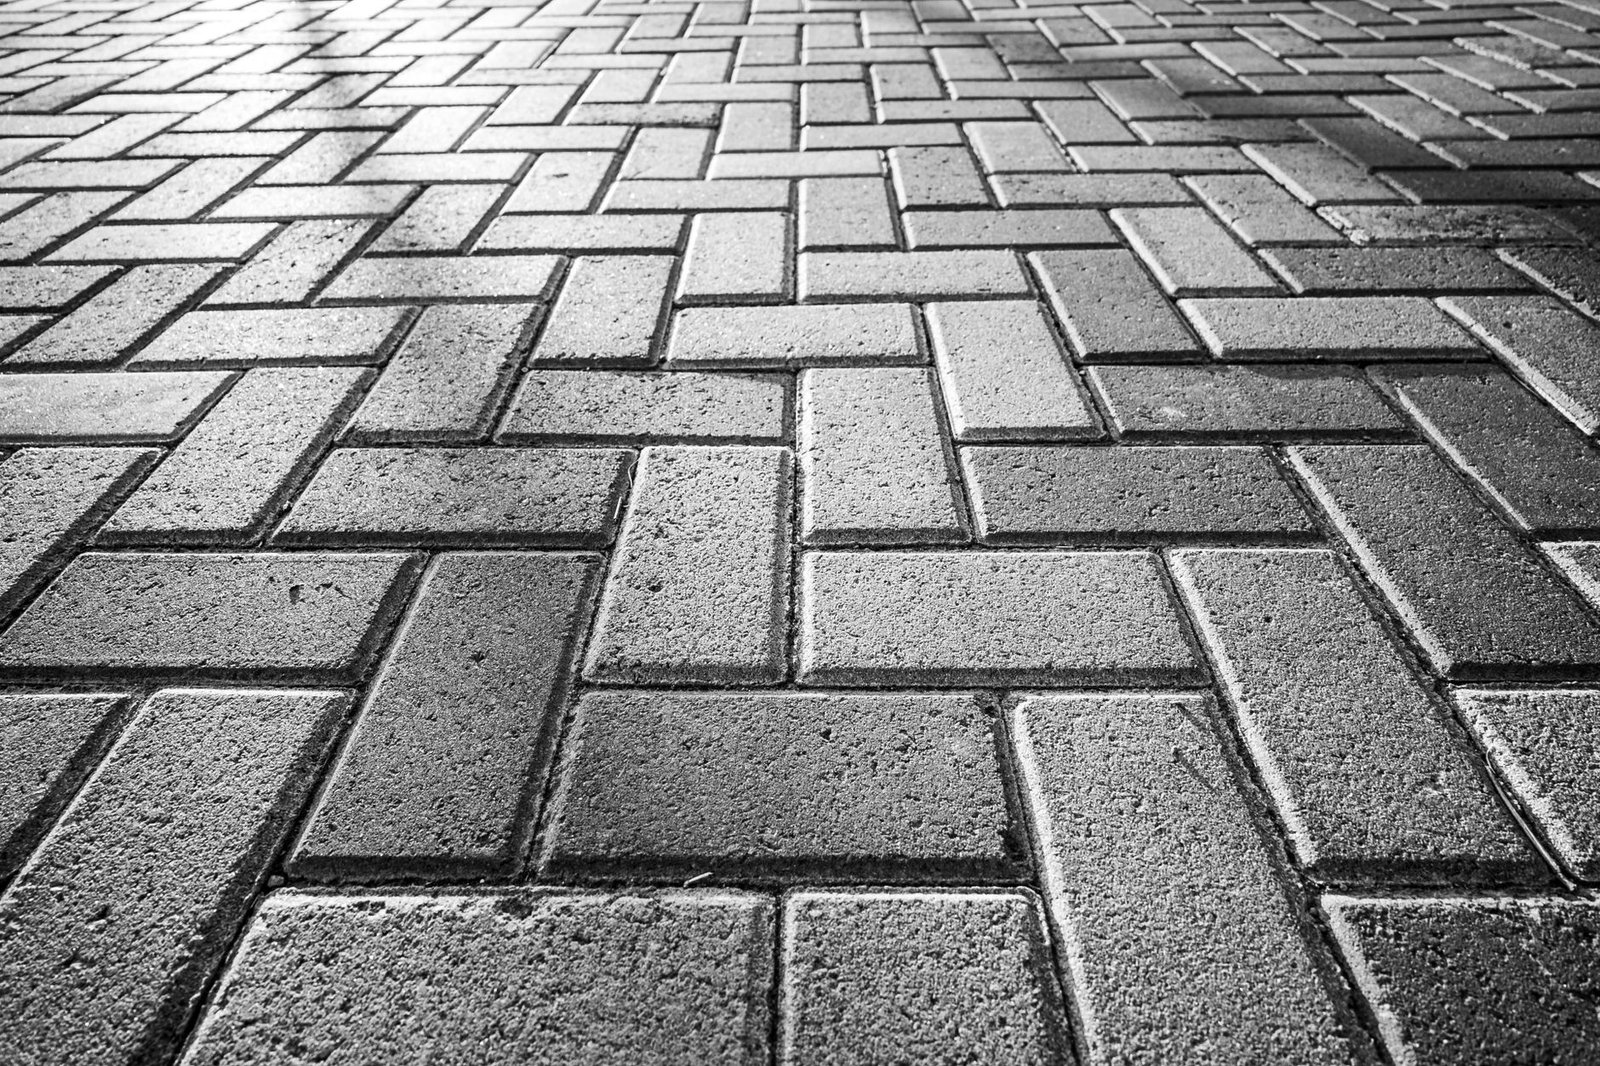
Before compaction, a paver rests on loose, screeded sand. The vibration does three things:
- Seats each paver. The bedding packs tight underneath.
- Levels neighbors to each other. Pavers set a hair high get driven down to match.
- Starts the interlock. Bedding sand rises into the bottom of the joints, and joint sand swept in from above fills the rest. Friction in full joints spreads load to neighbors.
This is the first time the bedding sand gets compacted, on purpose. My firm opinion: the sand bed is one inch, screeded and left loose until the pavers are on it. CMHA's guide spec is blunt: "Do not disturb screeded sand." Pre-compacted sand won't let the pavers seat.
Expect the surface to drop a little. How to Hardscape's guide to compacting pavers after laying puts it at up to 1/4 inch on a 1-inch concrete sand bed. So pavers start slightly proud of finished height, and an evenly screeded bed settles evenly. Setting that height is covered in screeding sand for pavers.
Compact before the joint sand and again after it
Some installers compact the bare pavers first; others sweep sand in first to cushion them. I read both camps' arguments and they mostly end up doing both, in this order:
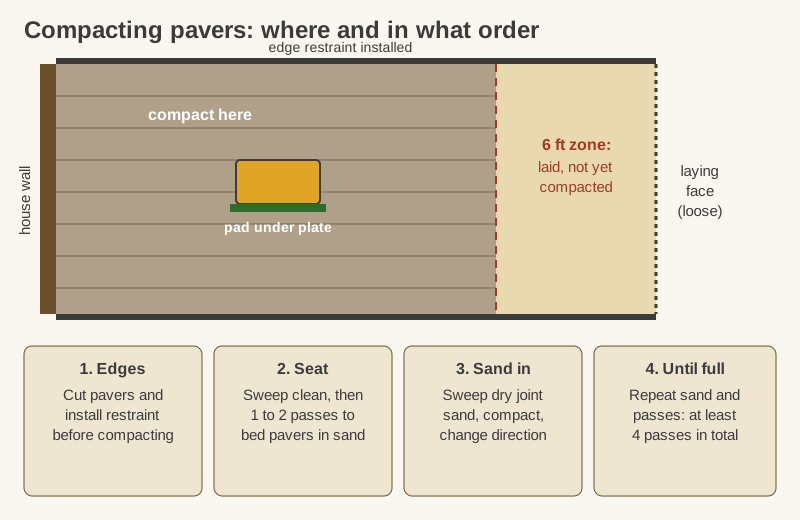
- Finish the edges. Cut the perimeter pavers and install the edge restraint. Compacting against a loose edge pushes the outer pavers out.
- Sweep the surface clean. Grit trapped under the pad is what scratches pavers.
- Make the seating passes. Run the compactor over the whole area once or twice to vibrate the pavers into the bedding sand.
- Sweep in dry joint sand and compact again, topping up joints as they open.
- Repeat until the joints are full. The Concrete Masonry & Hardscapes Association's guide specification says spreading, sweeping and compacting the joint sand until full requires at least 4 passes with a plate compactor.
Polymeric sand follows the same pattern, with sand and pavers dry. Compact it in, top it up to about 1/8 inch below the paver surface or chamfer, blow every grain off the paver faces, and only then wet it. The full procedure is in how to apply polymeric sand.
Keep 6 feet back. The same CMHA specification says not to compact within 6 feet of unrestrained edges, including the laying face you're still working on. On a big job, compact everything more than 6 feet behind the laying face each evening, and cover the loose edge with plastic. (Vibrate an unrestrained edge and the outer row simply leaves.)
Choosing and setting up the compactor
A rented forward plate compactor is the right machine for residential pavers. For commercial work, the CMHA specification calls for a low-amplitude plate with at least 5,000 lbf of compaction force at 75 to 100 Hz. Lighter rental plates are used on patios every day, which is a reason not to skip passes.
What matters more than size:
- The pad. Fit a urethane or rubber pad to the base plate, or rent a plate with one attached. Bare steel chips edges, scuffs faces and marks colored or textured units.
- A clean pad. Check it between passes. A single stone stuck to it will draw a line across the patio with the confidence of a toddler holding a crayon.
- A roller attachment, if the rental yard has one. Roller kits ride on urethane-coated drums. Western Interlock's article on compacting paving stones without breaking them describes this as the most protective option.
Our explainer on what a plate compactor is covers forward vs reversible machines and weight classes.
Passes, direction and pace
Work in a pattern so no strip is missed or hammered:
- Start at the edges and work around the perimeter, then move inward.
- Run straight lanes across the field, overlapping each by a few inches.
- Change direction for the next pass: across the first lanes, then diagonally.
- Keep moving. Don't let a running compactor sit still or spin on the pavers. Swing wide at lane ends.
- Watch and listen. A rattle or a sharp crack is a broken paver. Stop, mark it and keep going.
After the final pass, check with a straightedge. CMHA's tolerances are the part of its spec worth taping to the compactor handle: no more than 1/8 inch height difference between adjacent pavers, and no more than 3/8 inch deviation under a 10-foot straightedge.
How to avoid chipped and cracked pavers
Chipped corners are the most common complaint after compacting pavers. The causes:
- No pad, or a worn pad. Replace a pad that's torn through.
- Grit on the surface. Sweep before every pass.
- Pavers jammed edge to edge. With no joint, vibration knocks their edges together. Keep joints at the manufacturer's width.
- A thin or uneven sand bed. A paver on a high spot of base, with little sand under it, has no cushion and can crack.
- Wrong product. Thin natural stone, large-format slabs and porcelain pavers often shouldn't be plate compacted at all. Check the manufacturer's instructions before you pull the start cord.
Replace any cracked paver before the joint sand goes in.
Hand tamping pavers in small spots
For a stepping-stone path, a small landing or a spot repair, hand tamping works. Lay a 2×4 across several pavers and strike it with a rubber mallet, moving the board as you go, or tamp through a board with a steel hand tamper. Don't hit the paver directly with a steel tool.
It's no substitute for a plate on a full patio.
Pad on, edges locked, joints full: then you're done
Compacting pavers decides whether the surface stays flat. Finish the edges, fit a clean pad, make seating passes, then sweep in joint sand and compact until the joints stay full. Keep the machine moving, stay 6 feet back from loose edges, and replace any paver that cracks. Then return the compactor, sweep one last time, and stand on your patio. It should feel like one thing, not four hundred.
FAQ
Should you compact pavers before or after sand?
Both. Make one or two passes on the clean pavers to seat them into the bedding sand, then sweep dry joint sand in and compact again, repeating until the joints are full.
Do you need a pad on a plate compactor for pavers?
Yes. A urethane or rubber pad protects the paver faces and edges from chipping and scuffing. Bare steel plates mark pavers, especially colored or textured ones.
How many passes should you make when compacting pavers?
Plan on at least 3 to 4 passes in different directions. CMHA's specification calls for a minimum of 4 passes while compacting the joint sand in, and more if the joints keep opening up.
How much do pavers settle when compacted?
Usually up to about 1/4 inch on a 1-inch concrete sand bed. That's why the screed rails are set so the pavers start slightly proud of the finished height and compact down to it.
Can you compact pavers without a plate compactor?
On small areas, yes. Lay a 2×4 across the pavers and tap it with a rubber mallet, or use a hand tamper through a board. For a full patio or driveway, rent a plate compactor with a pad; hand tamping can't match its consistency.
Can you compact wet pavers?
Avoid it. Wet joint sand won't flow into the joints, and polymeric sand will start to activate. Let the pavers and sand dry before you compact.